When I showed the pillows I just made for the Living Room, I was surprised at how many emails and comments I got asking questions about "how to". I thought I would do a basic tutorial from start to finish on how to make a decorator pillow.
I am going to use a 12 x 16 pillow form for this pillow.

Next I decided on this fabric. I cut two pieces 13 1/2 x 17 1/2. This allows for a 3/4" seam allowance all the way around.

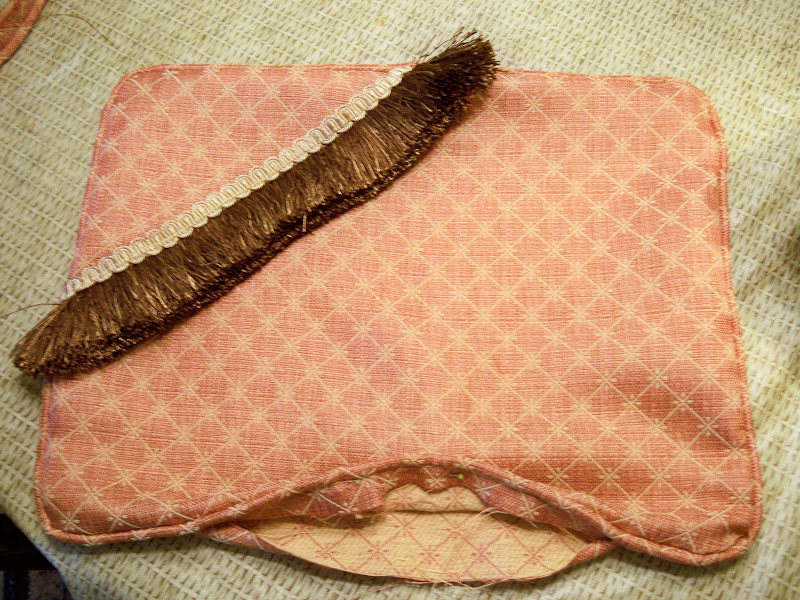
I want to give the pillow a little bit of a custom touch and I have a few scraps of trims left over from previous projects.

I decided on this combination. Be sure to set the pillow upright and take a look. You would be surprised at how differently a trim can look when you are looking down on it and when it is sitting up where it will eventually go. I also am going to use a self fabric cording around the pillow.

Since I had such a small scrap of trim, this dictated what I could do with it. Pin it down.

Next, take it to the machine and sew it in place.

Since I decided to use a second piece of trim on top. Just lay it down and sew it in place.

Trim is complete.

Next, I am making the cording. Cut a strip of fabric long enough to go around the entire pillow. If need be, piece two pieces together. Next using the zipper foot on your machine, place the cording in the center of the strip and sew close to the cording.

Cording is all done.

Place the cording down on the right side of the pillow. Starting at what will be the bottom of the pillow, leave one section of cording open so you can join the two sections later.

Using the zipper foot sew close to the cording and sew the cording down to the pillow top. When you come to a corner, clip the cording selvage in several places to help it easily turn the corner. Continue stitching all the way around the pillow.

Next, fold back your open end of the cording fabric and cut the joining end off so that it butts up next to the white cording smoothly. Fold the end edge of the open fabric under and place the joining cording inside the fold to create a smooth joint and hiding the cut end. One end is hidden inside the fabric of the top piece. (Hope that makes sense.) Stitch down, staying really close to the cording.

Look close and you can see the folded over section on the left, about in the middle. This is a nice and neat section and almost invisible where you joined the cording.

Now the cording is sewn on all the way around the pillow and the top is complete. Notice again on the bottom center of the pillow how neat the area is where the cording was joined.

Take the back side of the pillow and place the two pieces of fabric right sides together and pin all 4 corners. Since we are not going to use a zipper, start sewing the two sections together on the bottom about 2 inches before the corner. Using the zipper foot make sure to stay really close to the cording. Continue all the way around the pillow, again stopping about 2 inches past the bottom opposite corner. This creates an opening to insert the pillow form.

Clip all the corners to remove excess fabric.

Turn the pillow inside out and now you can see the finished pillow. Make sure to flatten your cording all the way around.Now you can see the opening you've created on the bottom. Insert your pillow form and adjust it to fill all the corners and make sure it is evenly placed in the your pillow cover.

Now we are going to turn the back side of the pillow fabric under and blind stitch it to the front being sure to stitch next to the cording. This method gives you a completely finished pillow that will look nice from all sides. ( This also shows a great picture of where we joined the cording. You can barely tell how they were joined.)

See how pretty it looks when it is blind stitched. You can't see the stitching at all.

Now here it is all done. Looks very professional and from start to finish took about 20 minutes to sew.

By using the blind stitching method to close a pillow cover, you can creat reversible pillows that allow you to get two looks out of the same pillow. They look fabulous from either side.

I hope this helped those that are wanting to create some new pillows for your home and I hope it shows you that they really are very easy to do. There are tons of shortcuts that I normally use, however, I wanted to take you step by step to show you all the basics. As you begin to make all of your new pillows, you will learn a few shortcuts on your own. If you missed my new Living Room look with all my new pillows, check out my previous post. I can't wait to see all the new pillows you make.

Post Title
→Decorator Pillow Tutorial
Post URL
→http://netdesignworld.blogspot.com/2010/06/decorator-pillow-tutorial.html
Visit Design World for Daily Updated Collection


